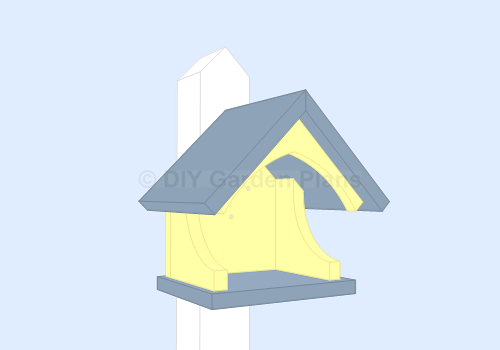
Birdhouse Nesting Shelf Plans Material List
| Disc. | Qty. | Size |
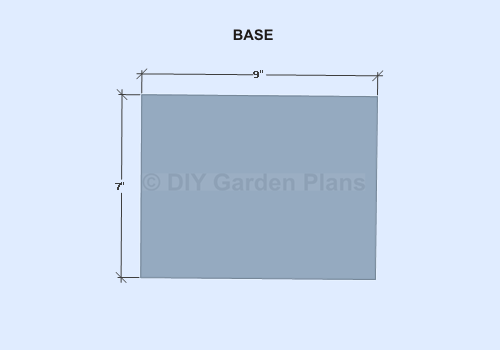
| 3/4″ -BASE (cedar, pine, redwood) | 1 | 7″x9″ |
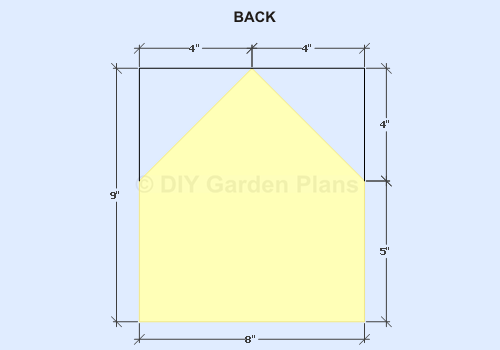
| 3/4″ -BACK (cedar, pine, redwood) | 1 | 8″x9″ |
| 3/4″ -SIDES (cedar, pine, redwood) | 2 | 5 1/2″x6″ |
| 3/4″ -ROOF (cedar, pine, redwood) | 2 | 8″x8 1/2″ |
| 3/4″ -TRIM (cedar, pine, redwood) | 1 | 6 1/2″x6 1/2″ |
| HARDWARE | ||
| 1 1/4″ finishing nails | ||
| 1 1/4″ wood screws | ||
| wood glue or construction adhesive | ||
| paint (optional) |
Use clamps to hold the parts and pre-drill the holes for better results. Use 1 1/4″ finishing nails to attach parts.
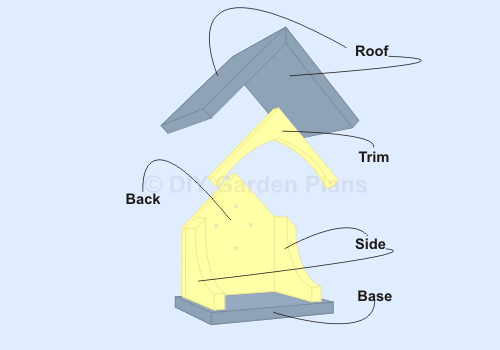
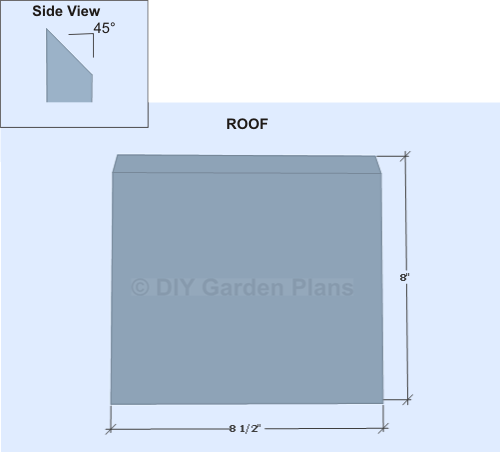
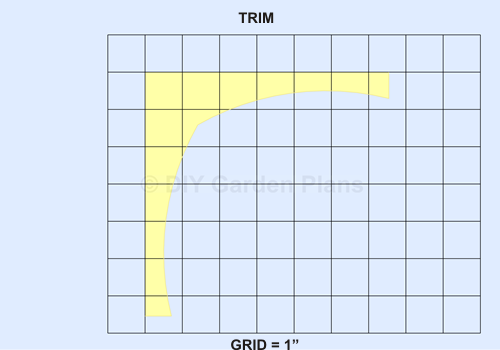
Cut out all of the birdhouse nesting shelf parts as shown below.
Mark the center of the base and back. Nail through the base and into the back.
Attach the sides by nailing through the back and into the sides. Nail through the base and into the sides. The sides will not be flush with the base.
Position the roof and attach. The roof will be flush with the back, the front and sides of the roof will have an overhang.
Attach the trim using construction adhesive or wood glue. The trim will not be even with the roof, it is about 1/2″ from the edge.
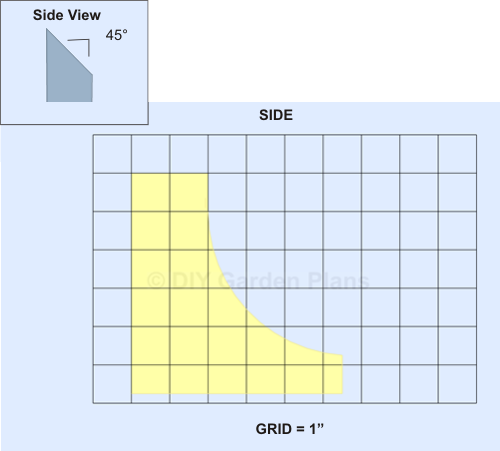
The top of the bird house sides have a 45 degree bevel cut, the sides will be flush with the roof.
Resources:
Birdhouses You Can Build in a Day (Popular Woodworking)
